
Install Information Server 11.7.1.1 (DataStage)
A special shout out goes to Vince Lo (IBM) who seems to knows everything there is to know about DataStage and sent me some great material to help with the installation.
Lately I’ve been helping a financial client upskill some of team members on the IBM product DataStage. DataStage is an ETL (Extract, transform, load) offering that can connect to just about any data source you can imagine. MySQL? Piece of cake. Db2? No problem? Amazon S3 and Azure Storage? Yup. Oracle, we got you covered. zOS files?! Yep. We can even read EBCDIC files.
DataStage is available in the new Cloud Pak for Data bundle and I’ve even got a workshop written up about it.
This document is for my own purpose to refer back to but if you find it useful then please let me know.
Platform
I used a VM from IBM Cloud with the recommended specs.
- OS: RHEL 7.x
- Minimum: 4 vCPU, 32 GB RAM, 100 GB Disk
- Recommended: 8 vCPI, 32 GB RAM, 100 GB Disk
Prereqs
You’ll need to get the installation files from either “Xtreme Leverage” (Internally) or Passport Advantage.
IS_V11711_Linux_x86_multi.tar.gzIS_V11711_EE_bundle_spec_file.zip
Steps
Upload the installation files
This first step is to be run locally
Upload the files to the VM from your local machine:
sftp root@169.55.177.38 <<< $'put IS_V11711_Linux_x86_multi.tar.gz'
sftp root@169.55.177.38 <<< $'put IS_V11711_EE_bundle_spec_file.zip'
Configure the VM
The rest of the steps are to be run on the VM
Install the required libraries. See the InfoSphere documentation for more info.
yum install -y unzip
yum install -y glibc
yum install -y libXp
yum install -y libXau
yum install -y libXext
yum install -y libX11
yum install -y libxcb
yum install -y libXmu
yum install -y libXtst
yum install -y nss-softokn-freebl
yum install -y bc
yum install -y netstat
yum install -y lsof
yum install -y libaio
yum install -y gcc-c++
yum install -y ed
yum install -y perl
yum install -y wget
yum install -y less
yum install -y net-tools
yum install -y ipcs
yum install -y sed
yum install -y grep
yum install -y fgrep
Upgrade the libraries.
yum -y upgrade
Disable SELinux, because, reasons.
setenforce 0
Configure the kernel memory and semaphore settings because the VM has unreasonable low settings by default. See the InfoSphere documentation for more info.
sysctl -w kernel.msgmax=65536
sysctl -w kernel.msgmnb=65536
sysctl -w kernel.sem="250 256000 32 1024"
Allow for more file descriptors
ulimit -n 65535
Start the installation
Unzip the installation and license files.
tar -xvzf IS_V11711_Linux_x86_multi.tar.gz
unzip IS_V11711_EE_bundle_spec_file.zip -d is-suite
Give read access to the installation files. In my setup it’s all under /root so run the command below.
NOTE: Be aware that this is a horrible idea and only advisible in a demo environment.
chmod -R 755 /root
Kick off the install by calling setup.
cd is-suite
./setup
The install wizard
For any step not documented here I just used the default values and clicked Next.
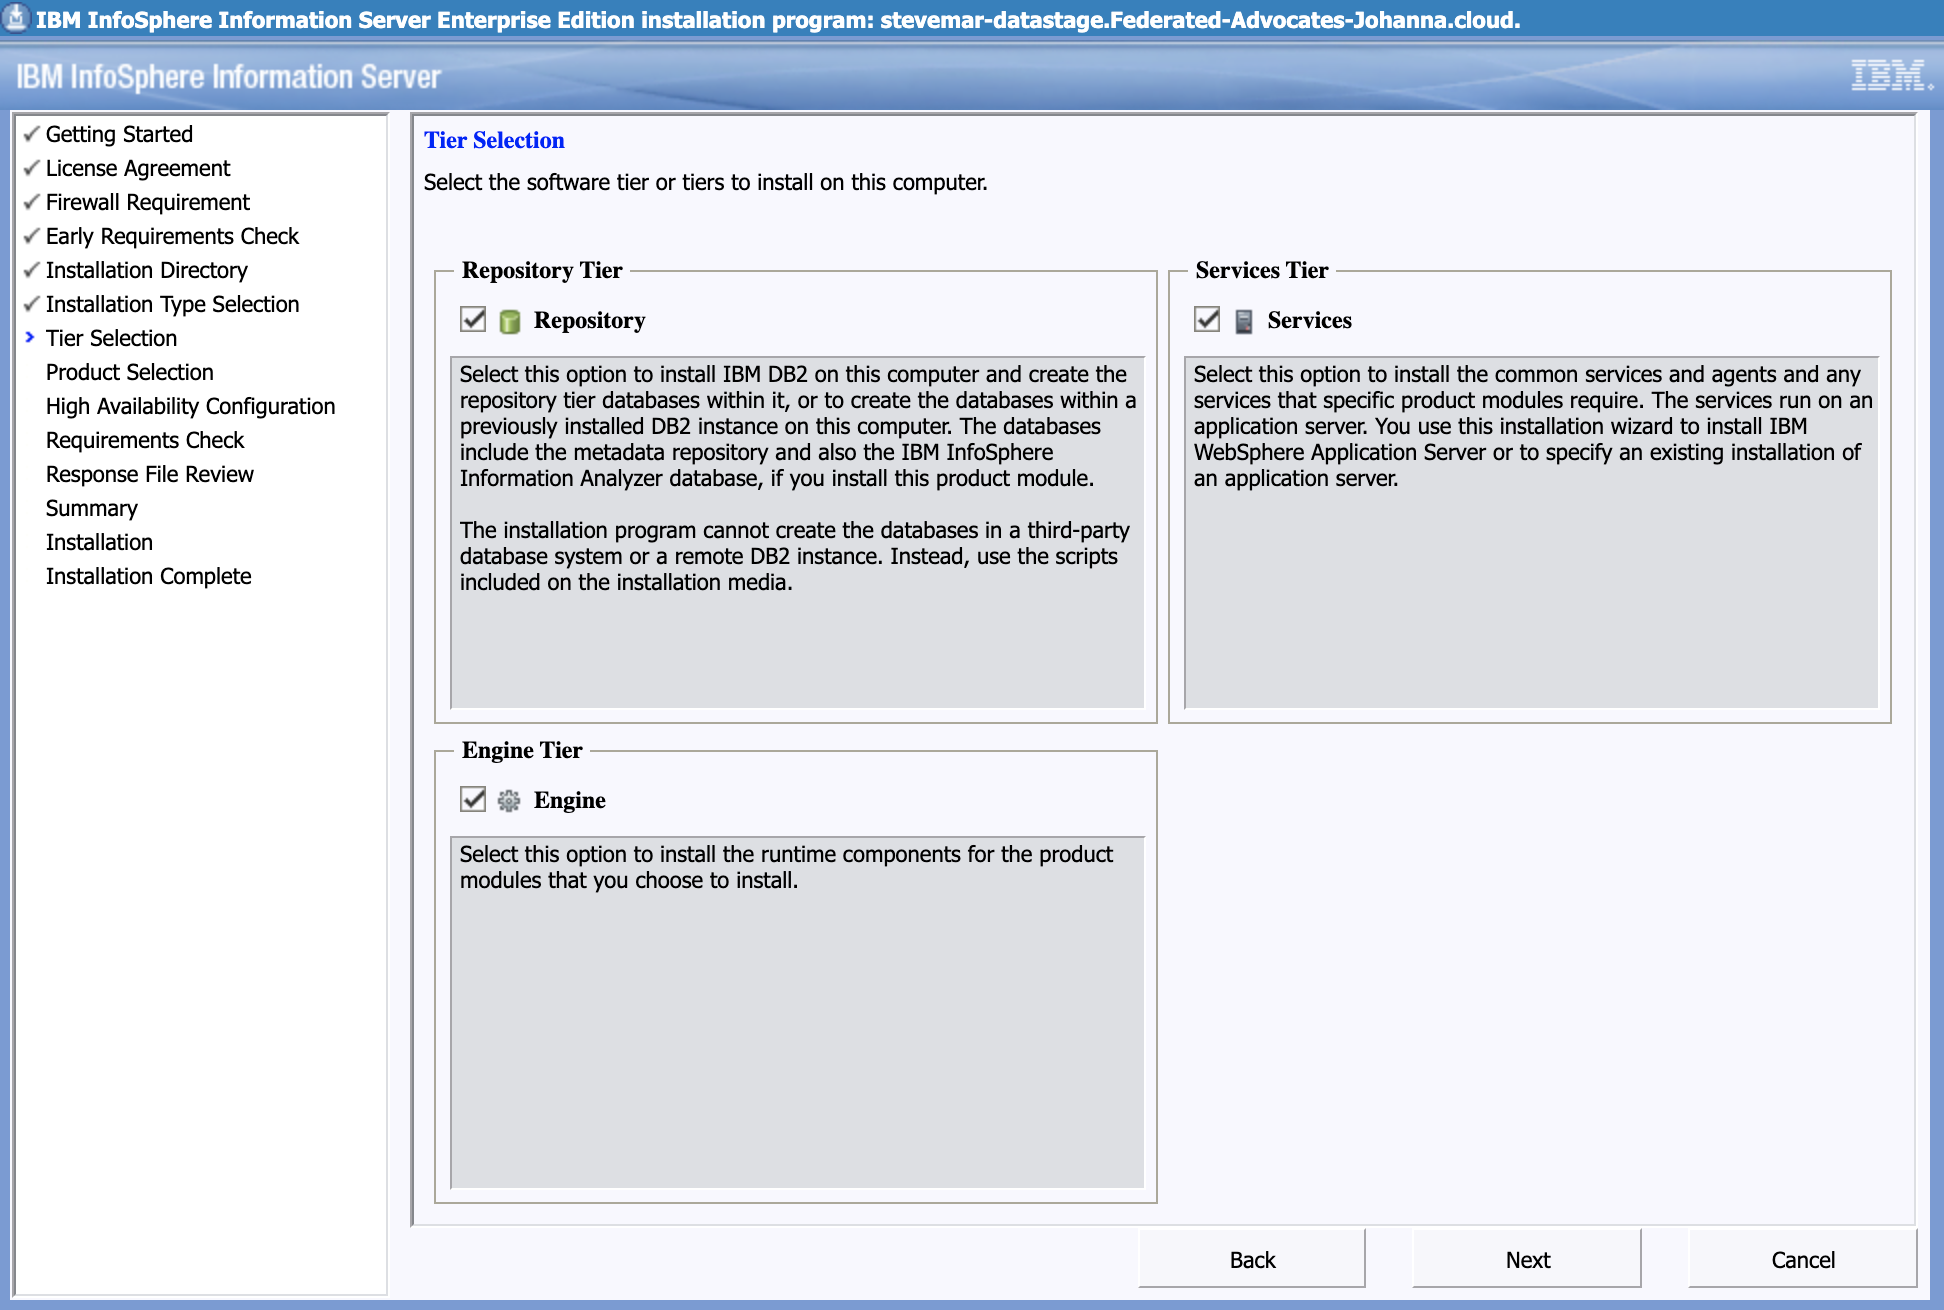
Choose to install the Repository, Services, and Engine Tiers
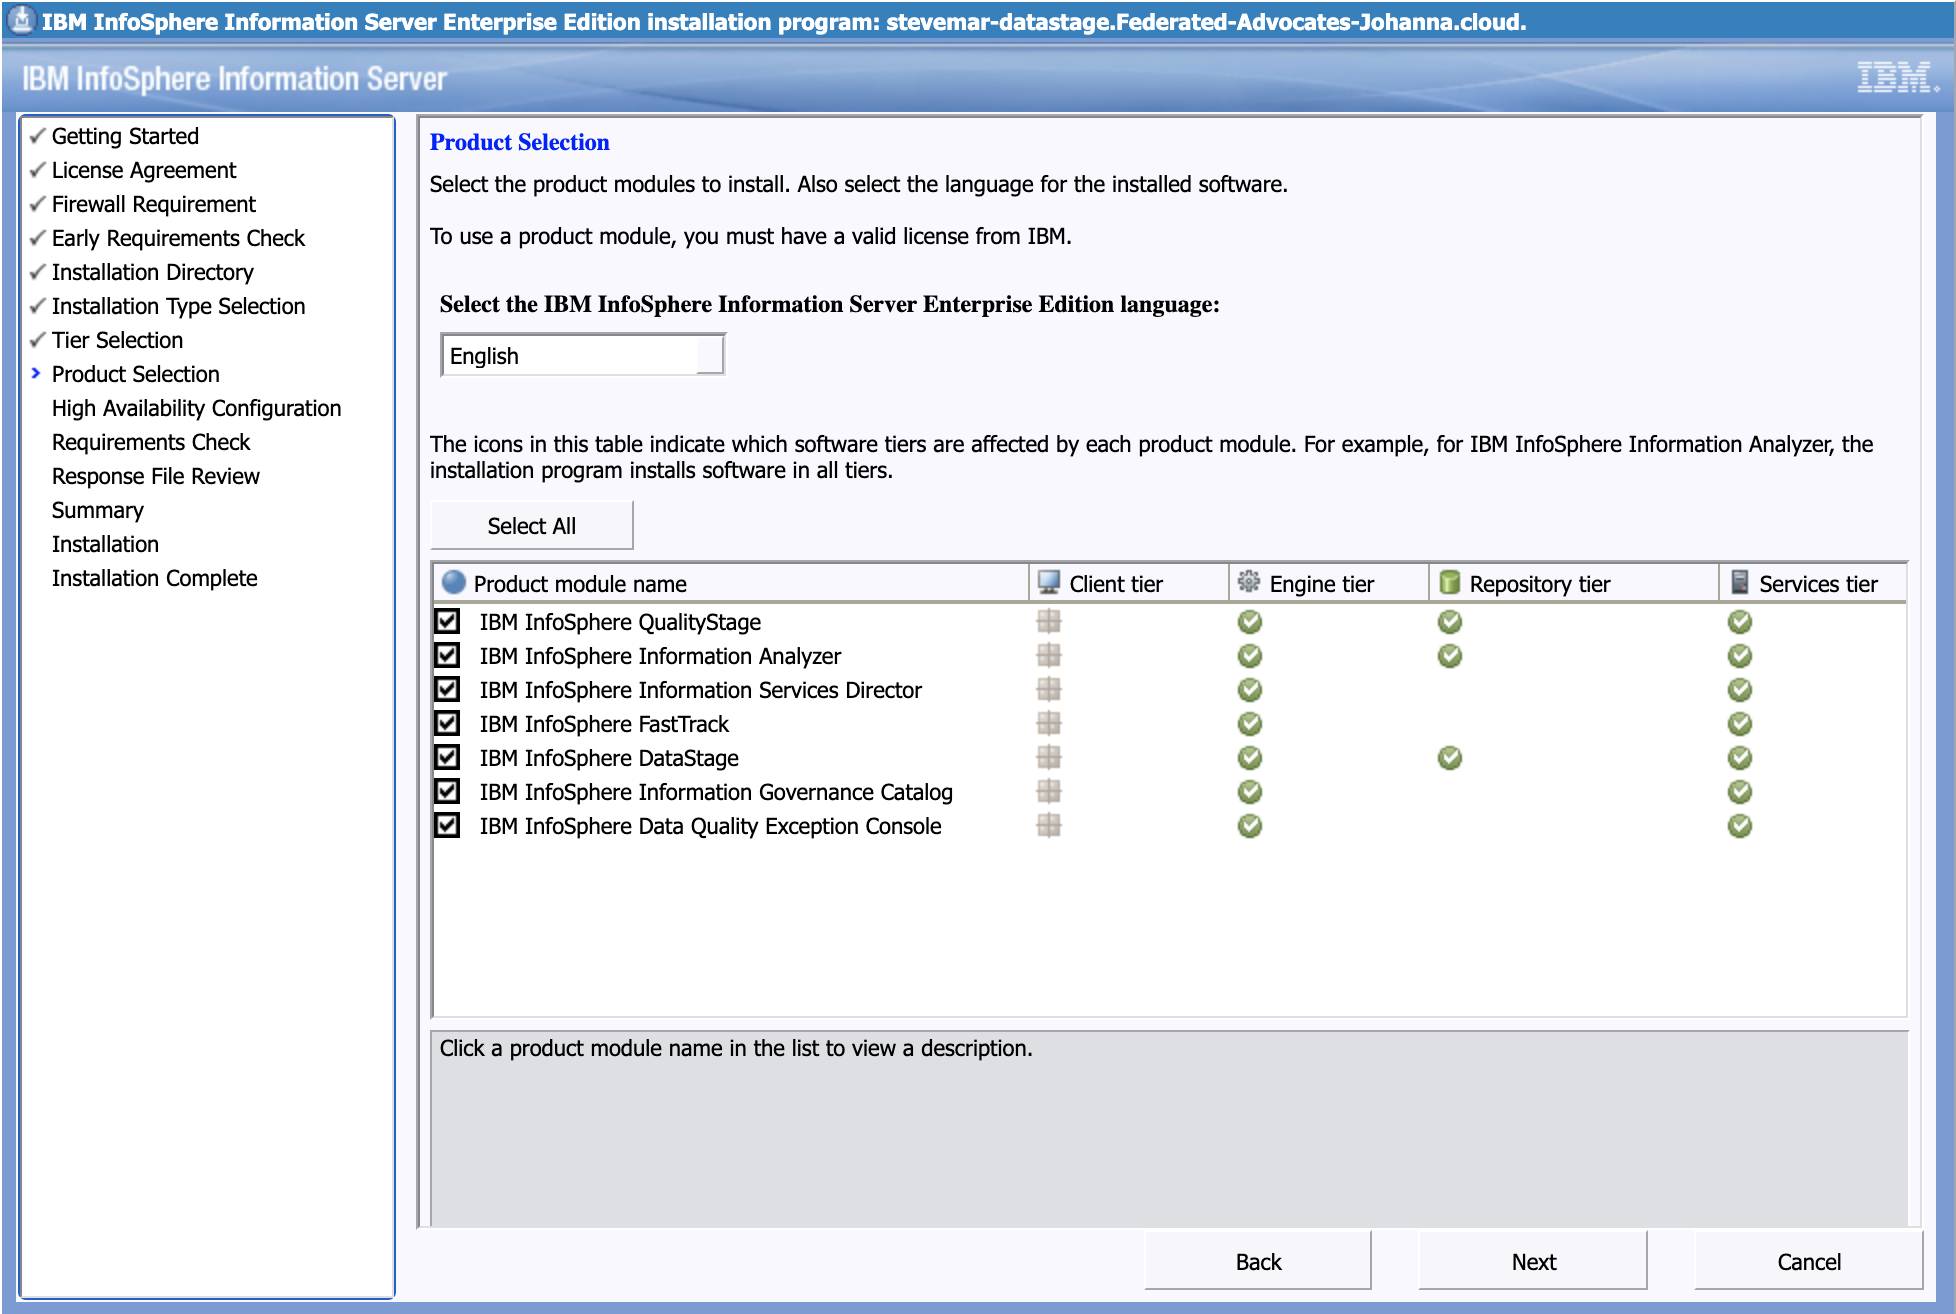
Choose all the IIS products. I only wanted DataStage, IA, and IGC but we’ll install them all anyway.
Install Db2.

Create any Db2 related users that are necessary
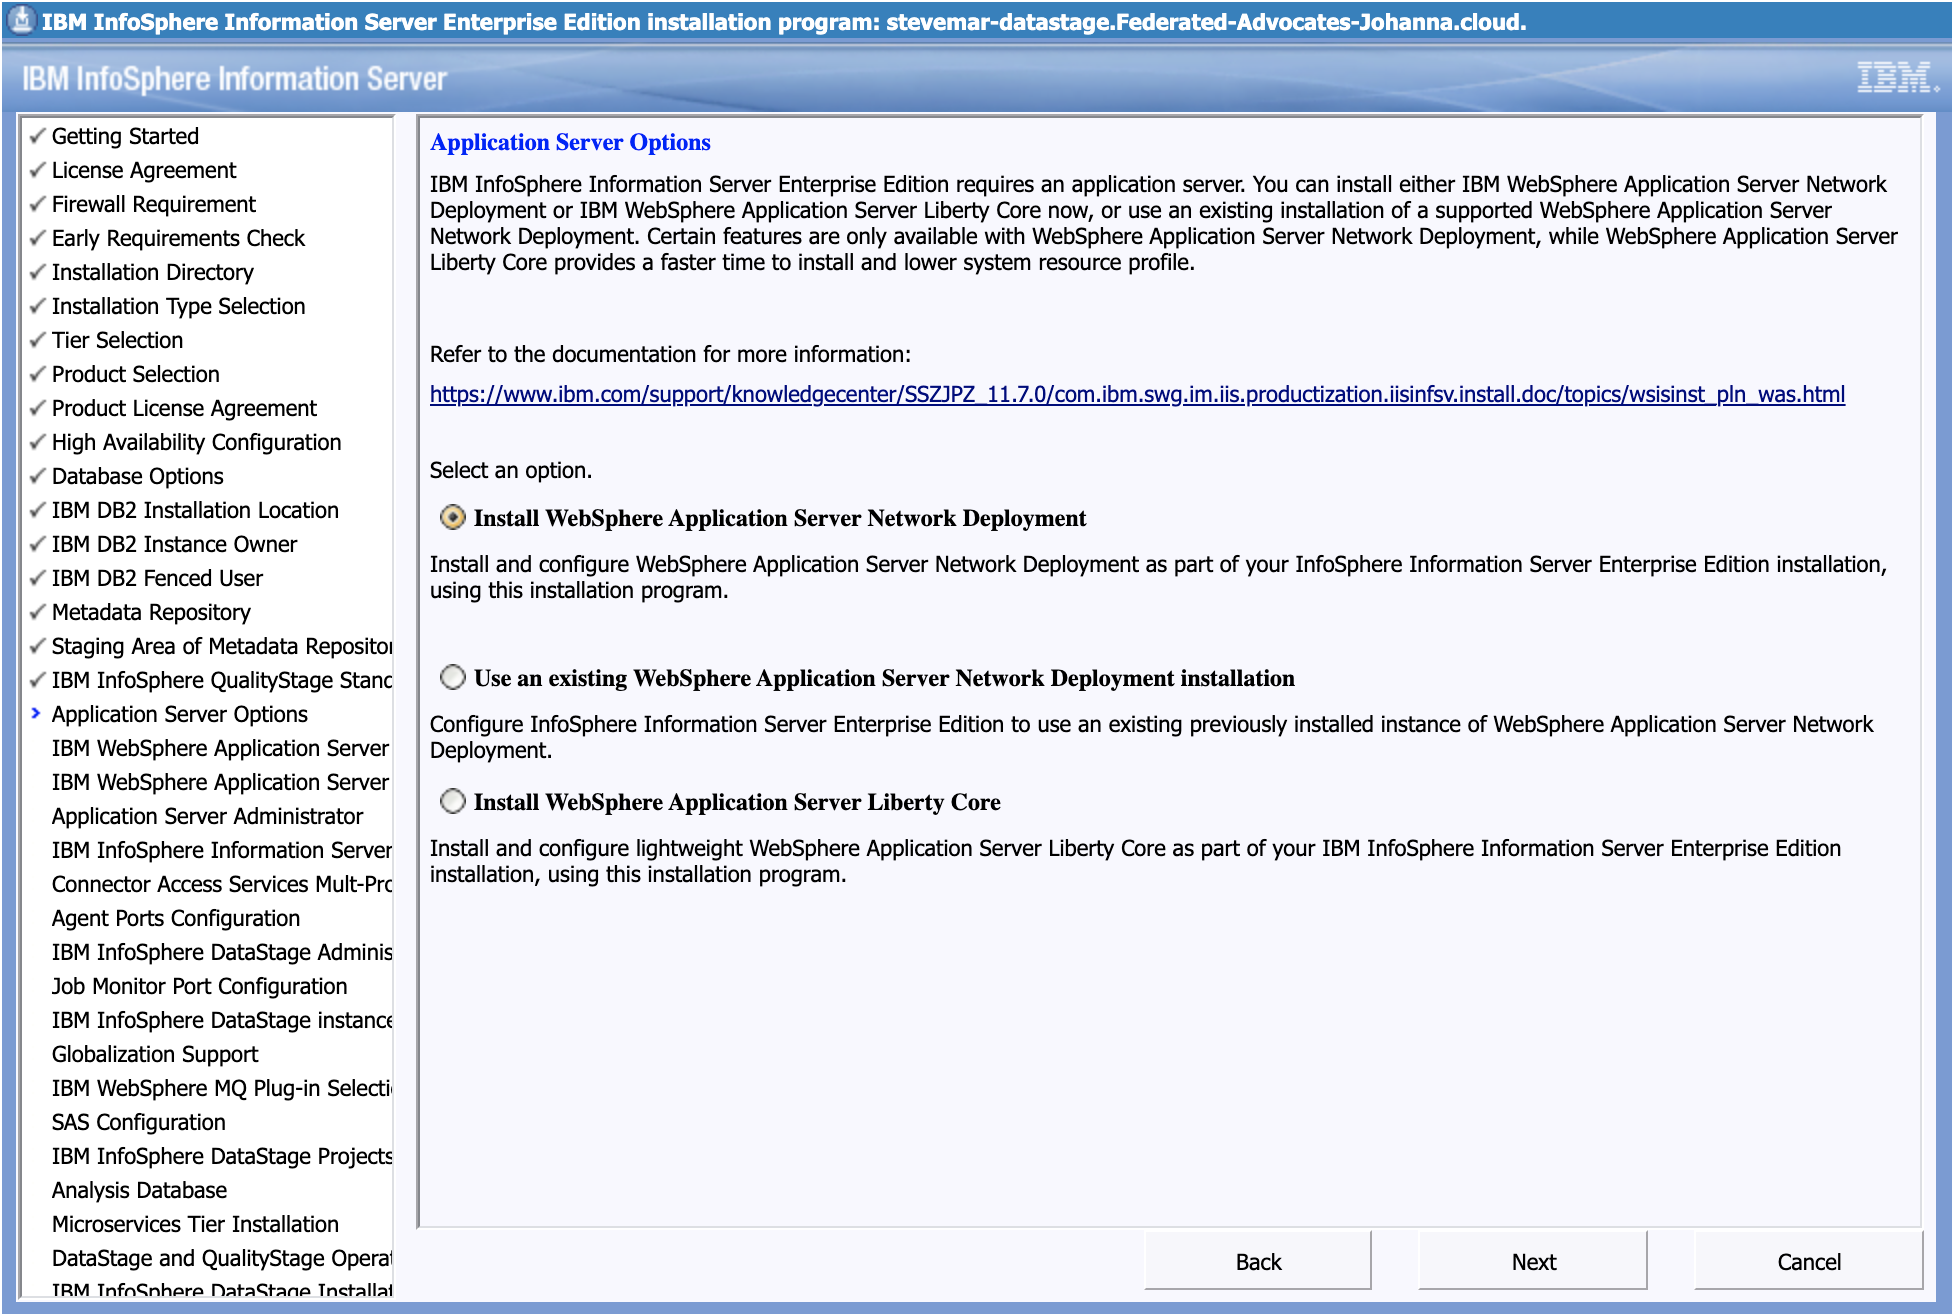
Install WAS.
Create any WAS related users that are necessary
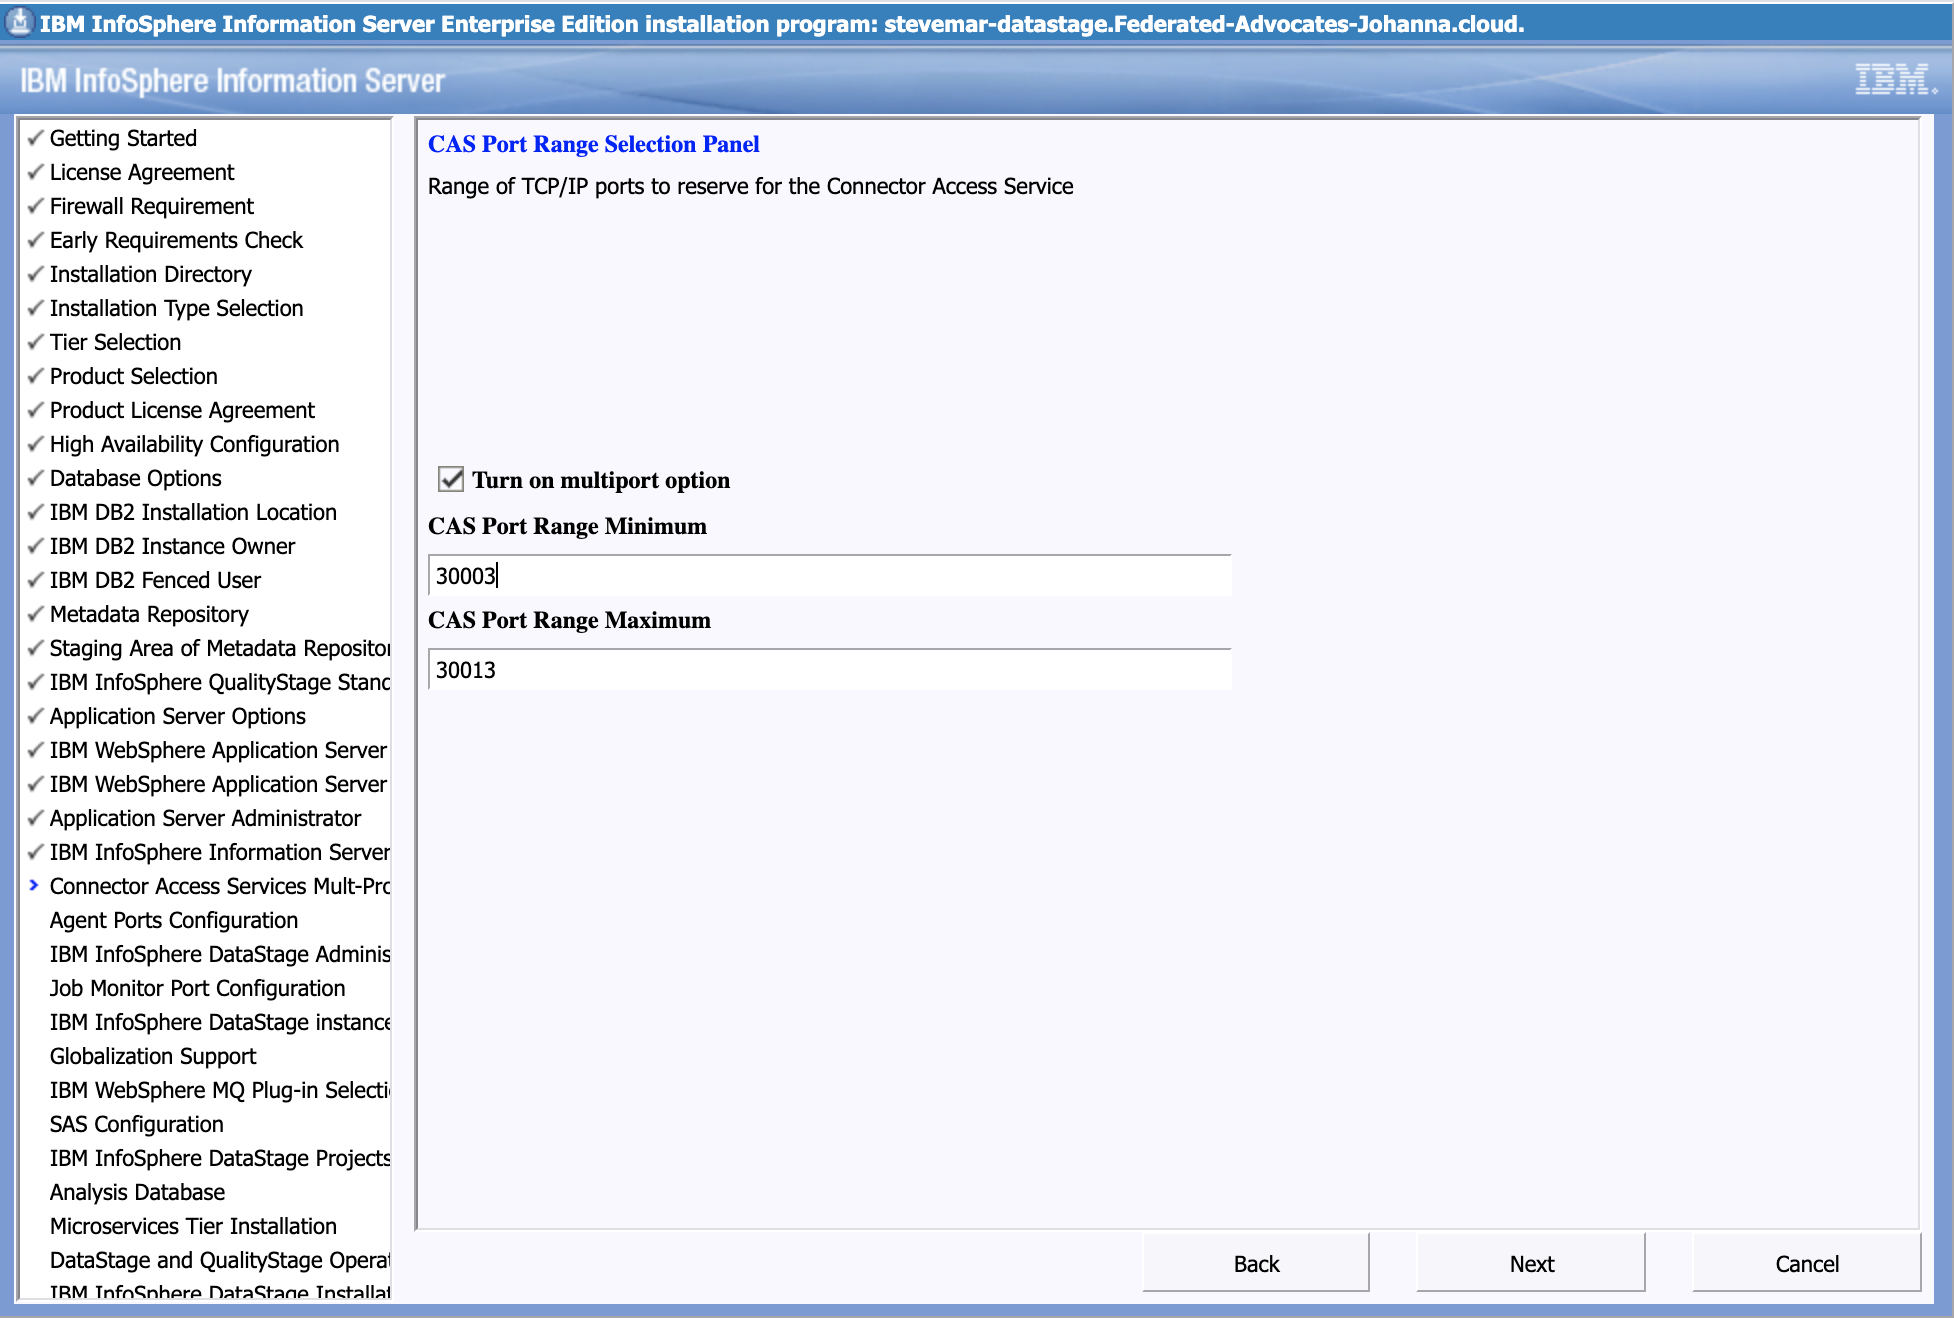
Change the WAS related ports to 30003 to 30013 since 30000 to 30002 are occupied.
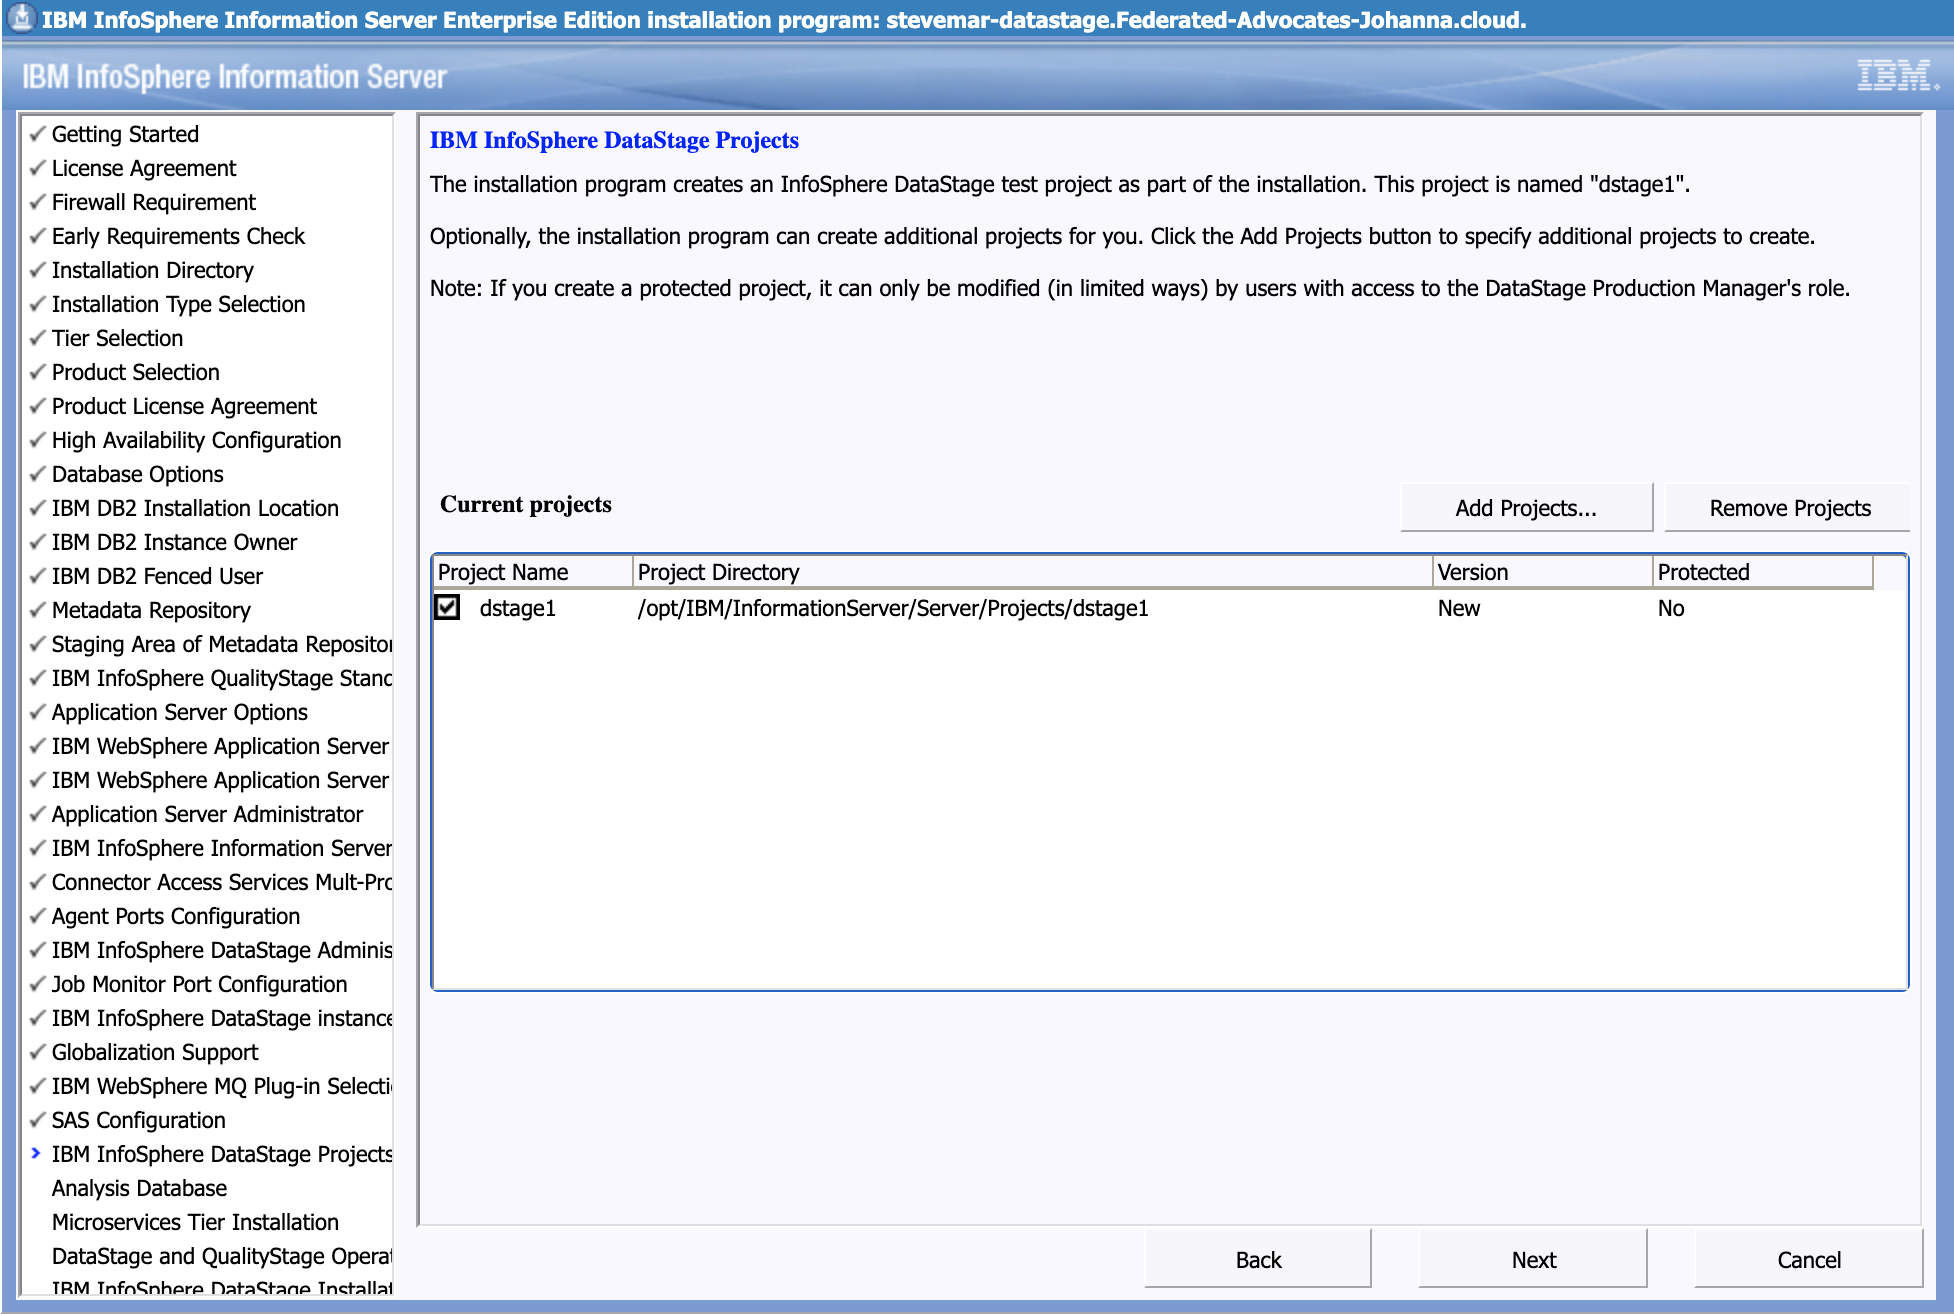
Install the example projects if you want.
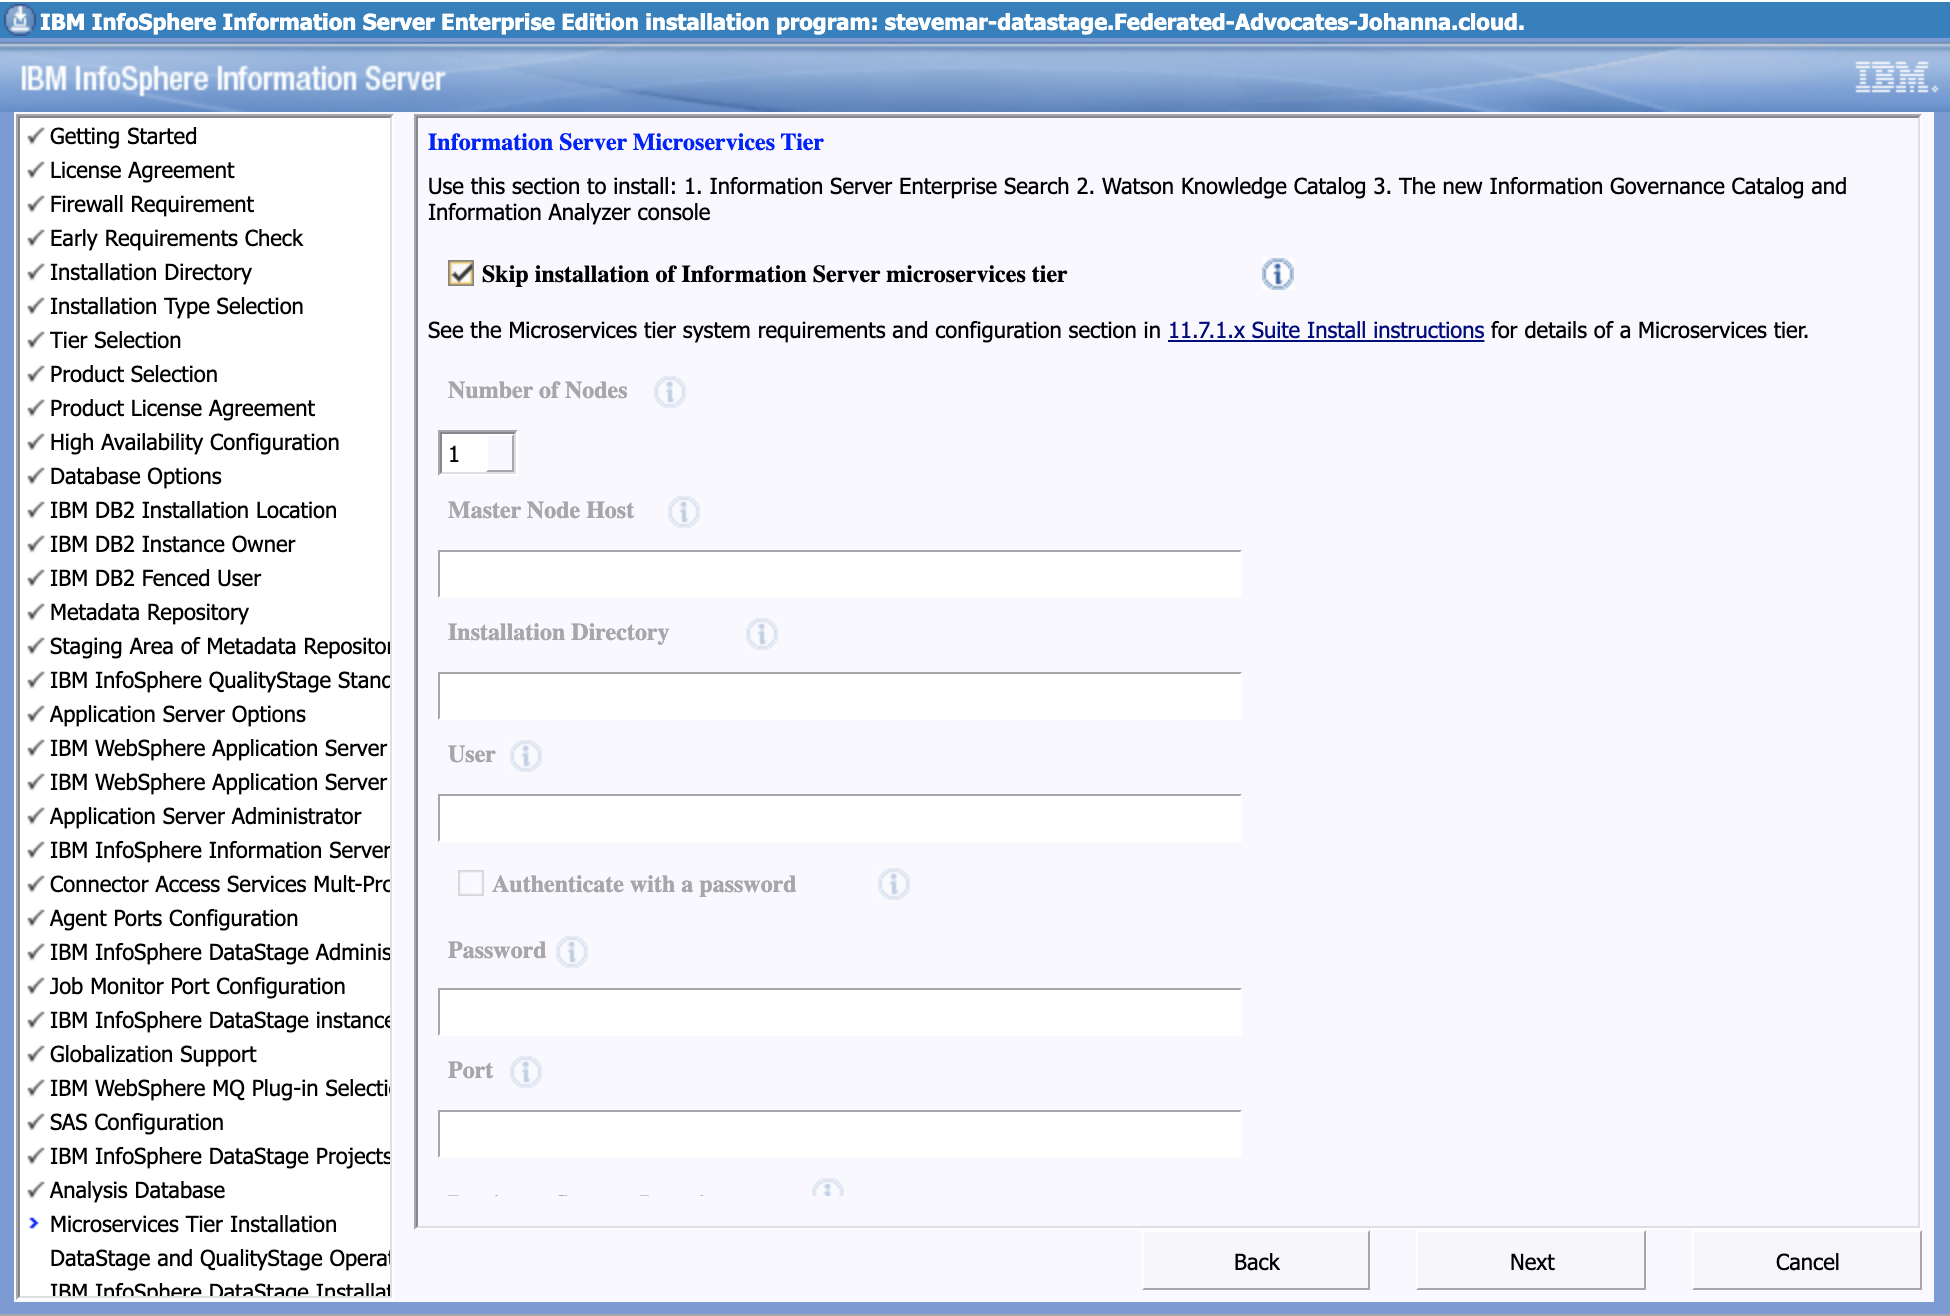
Do NOT install microservice tier
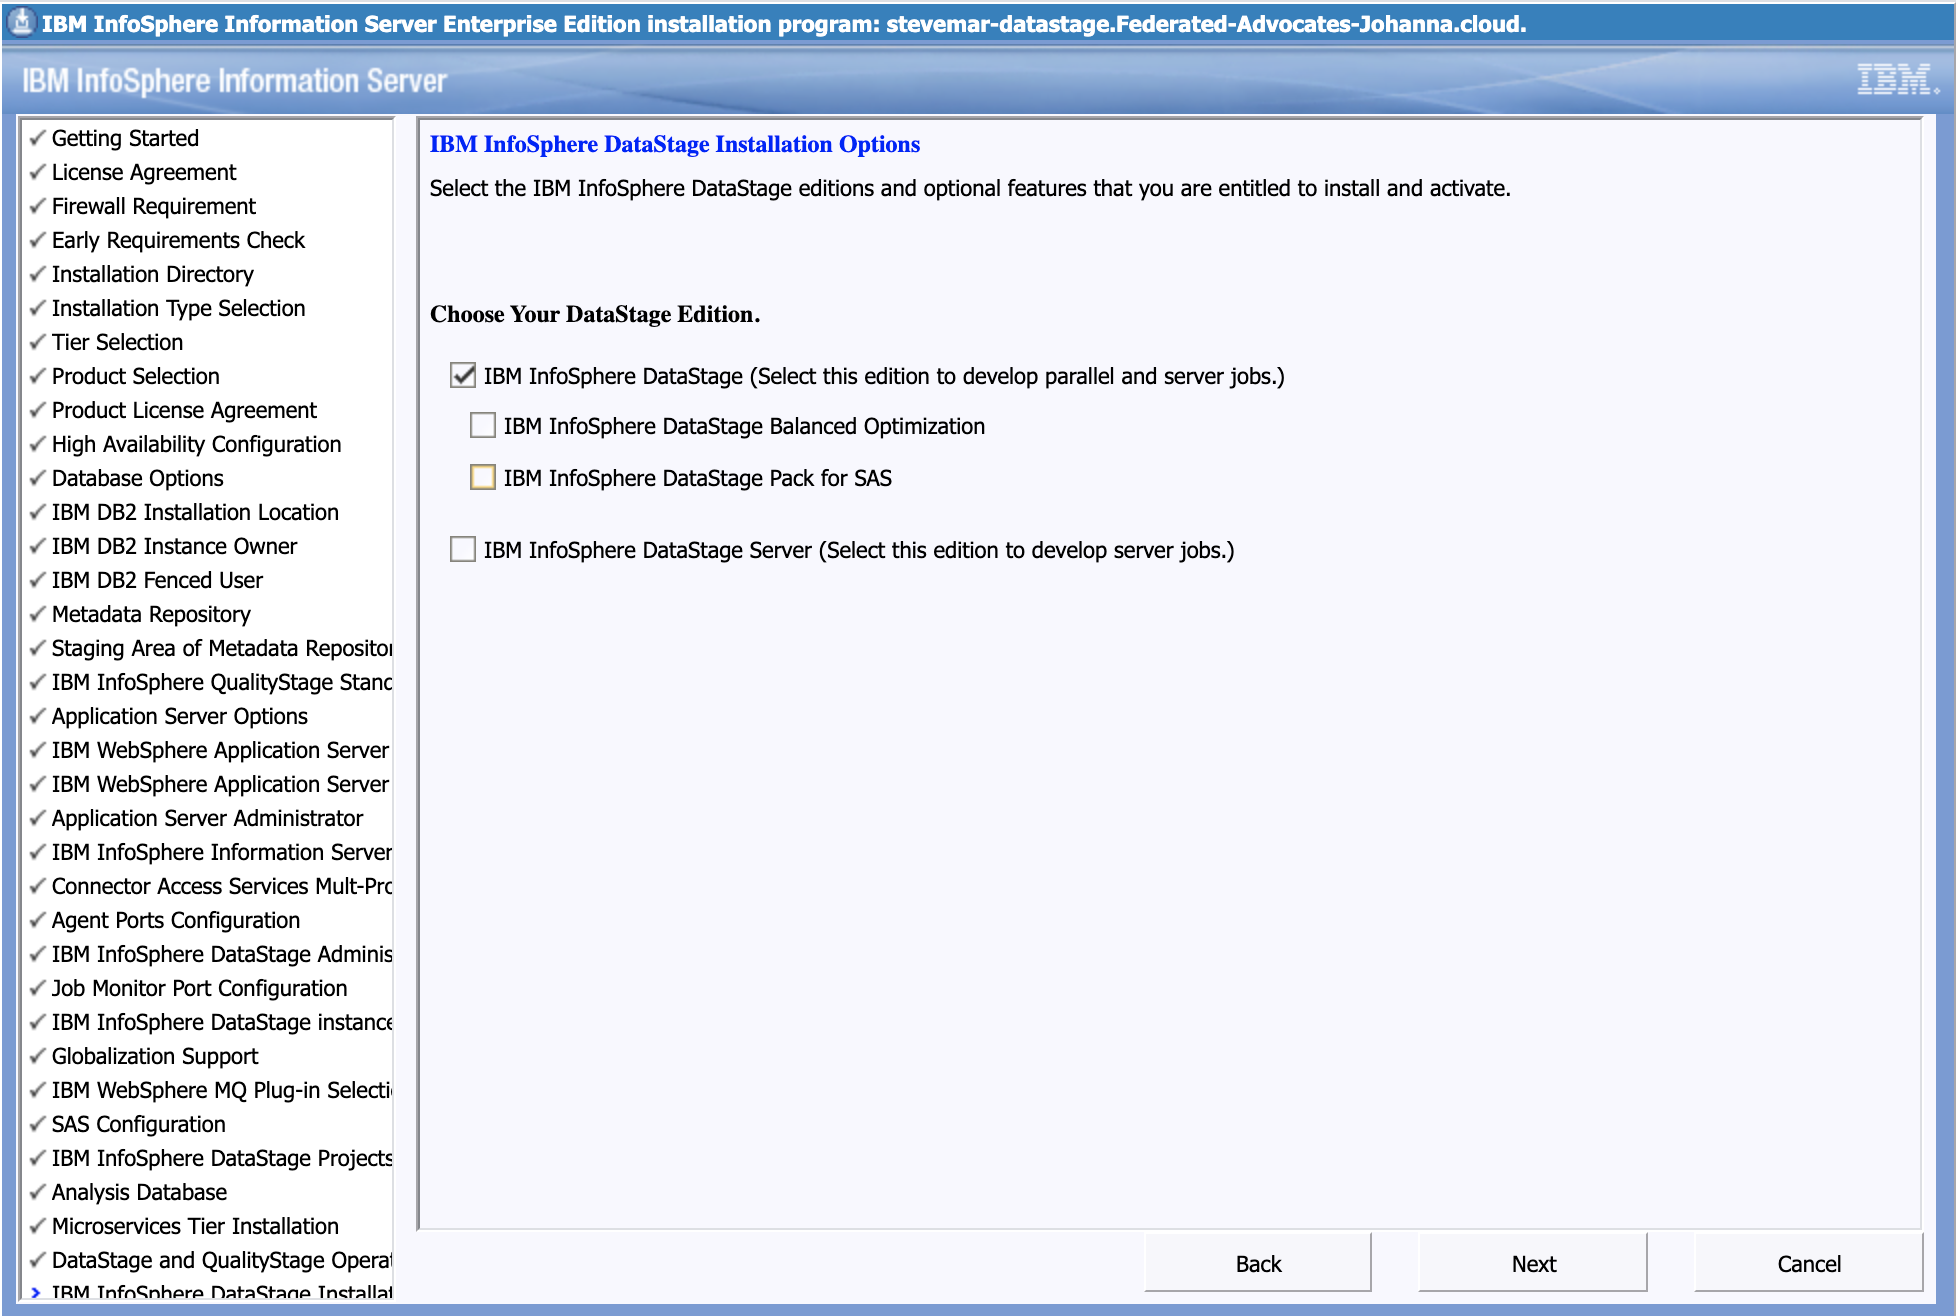
Choose the regular IBM InfoSphere DataStage edition
Run the pre-check, hopefully it passes.

The installation will take about 2 hours.
Summary
This sounds like it would make for a challenging Ansible playbook, I’ll try to spin one up in the near future.