
Adventures with IBM Kubernetes - Part 1
Background / my app
For my $DAY_JOB, a colleague and I were tasked with building a custom linter. Think https://jsonlint.com/ but for Front Matter, a mix of YAML and Markdown, typically used to provide some metadata to a document, not unlike what I use for this blog.
We ended up using:
- Flask to create a simple front-end
- JSONSchema was used in the backend (after snipping out the YAML)
- Markdownlint-CLI to validate the Markdown.
Yes, the last one is in Node while the others are in Python. Could we have done it all in Node, probably? But we know Python like the back of our hand, and the markdown CLI call is pretty darn simple.
Building image and testing locally
You can likely take any flask sample from the interwebs and as long as you can get it running locally you’re in good shape to containerize it.
Dockerfile
We created a Dockerfile to containerize our app, leveraging the Python 3.7 image. Lines 2 through 5 are only required if you need Node installed, too.
One issue we ran into was to ensure the app is hosted on 0.0.0.0. To do so, ensure the Flask app has the following line:
app.run(host='0.0.0.0'), otherwise when you run your Docker image it won’t work.
FROM python:3.7
RUN apt-get -y install curl gnupg
RUN curl -sL https://deb.nodesource.com/setup_11.x  | bash -
RUN apt-get -y install nodejs
RUN npm install -g markdownlint-cli
RUN mkdir /app
WORKDIR /app
COPY . /app
RUN pip install -r requirements.txt
EXPOSE 5000
ENTRYPOINT [ "python" ]
CMD [ "client.py" ]
Now that we’ve got our Dockerfile, we build the image and the run it.
$ docker build -t validator:latest .
...
bunch of docker build output
...
Successfully built 88496c6a34a3
Successfully tagged validator:latest
And run it …
$ docker run -d -p 5000:5000 validator
b199aa3d4d0a3ca61a0e5f0581c2c5459b6da1b1570c577a04e1d819ad30ccc4
Launch your favorite browser and make sure it’s running on http://localhost:5000.
Push to IBM Cloud Kubernetes Service
Now let’s expose our wonderful app to the rest of the world by using Kubernetes.
Prereqs
In addition to the IBM Cloud CLI we’ll need a few plugins, the container-service and container-registry plugins. They can be installed with the following commands:
ibmcloud plugin install container-registry -r Bluemix
ibmcloud plugin install container-service -r Bluemix
Push to IBM Cloud Container Registry
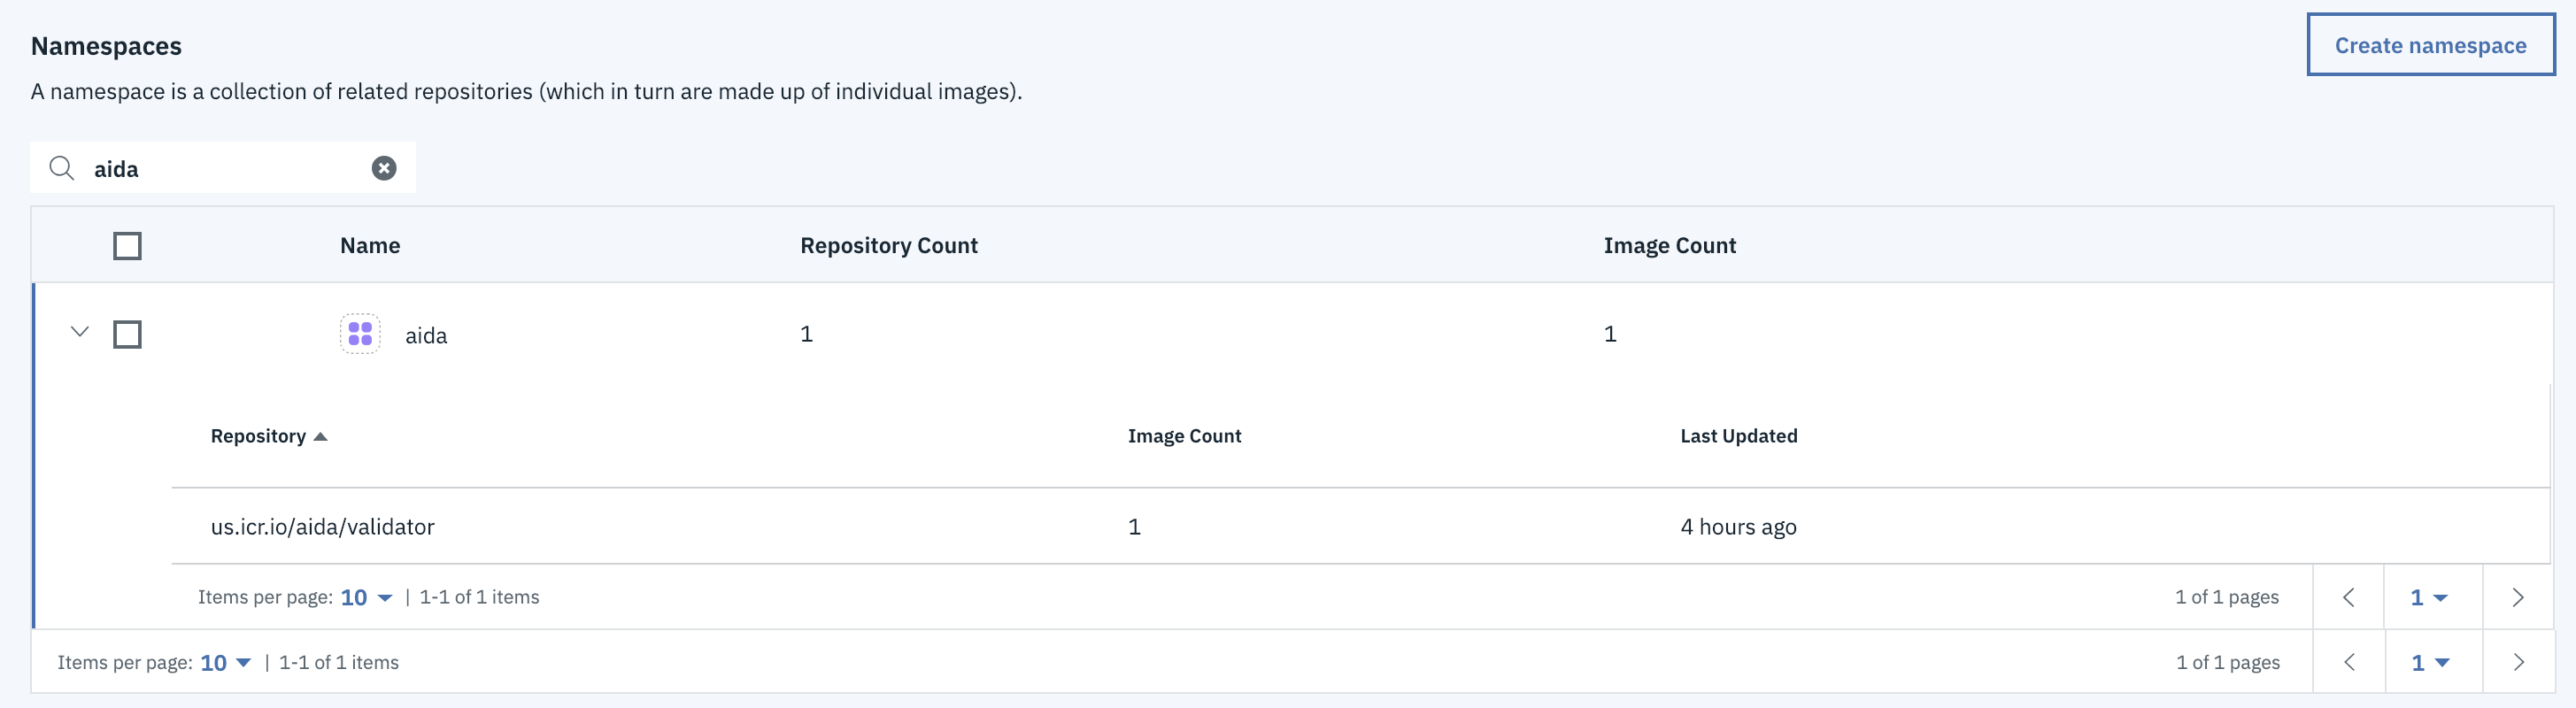
I unfortunately do not have the output captured for the below commands but they were pretty easy to perform. The gist of it is that you’ll need a Container Registry namespace, you can use the IBM Cloud console, or the CLI.
ibmcloud cr namespace-add aida
ibmcloud cr login
In this example aida is the namespace and validator is the image name. Here’s a snapshot of what it looks like from the IBM Cloud console.
Now that we’ve got a namespace we can push our Docker image to the Container Registry with a few commands provided by the console.
$ docker tag validator registry.ng.bluemix.net/aida/validator
$ docker push registry.ng.bluemix.net/aida/validator
The push refers to repository [registry.ng.bluemix.net/aida/validator]
fa64d9aa084c: Pushed
f49ef18aebc3: Pushed
...
c240c542ed55: Layer already exists
badfbcebf7f8: Layer already exists
latest: digest: sha256:83b1751c89...3e9b4860c480e4b size: 3688
Almost there, just gotta sping up our kube cluster and point to our image.
Deploy to IKS
To create our kubernetes cluster I used the IBM Cloud console, gave it a name validator-beta, selected 2 workers, and picked the lowest requirements to keep costs down.
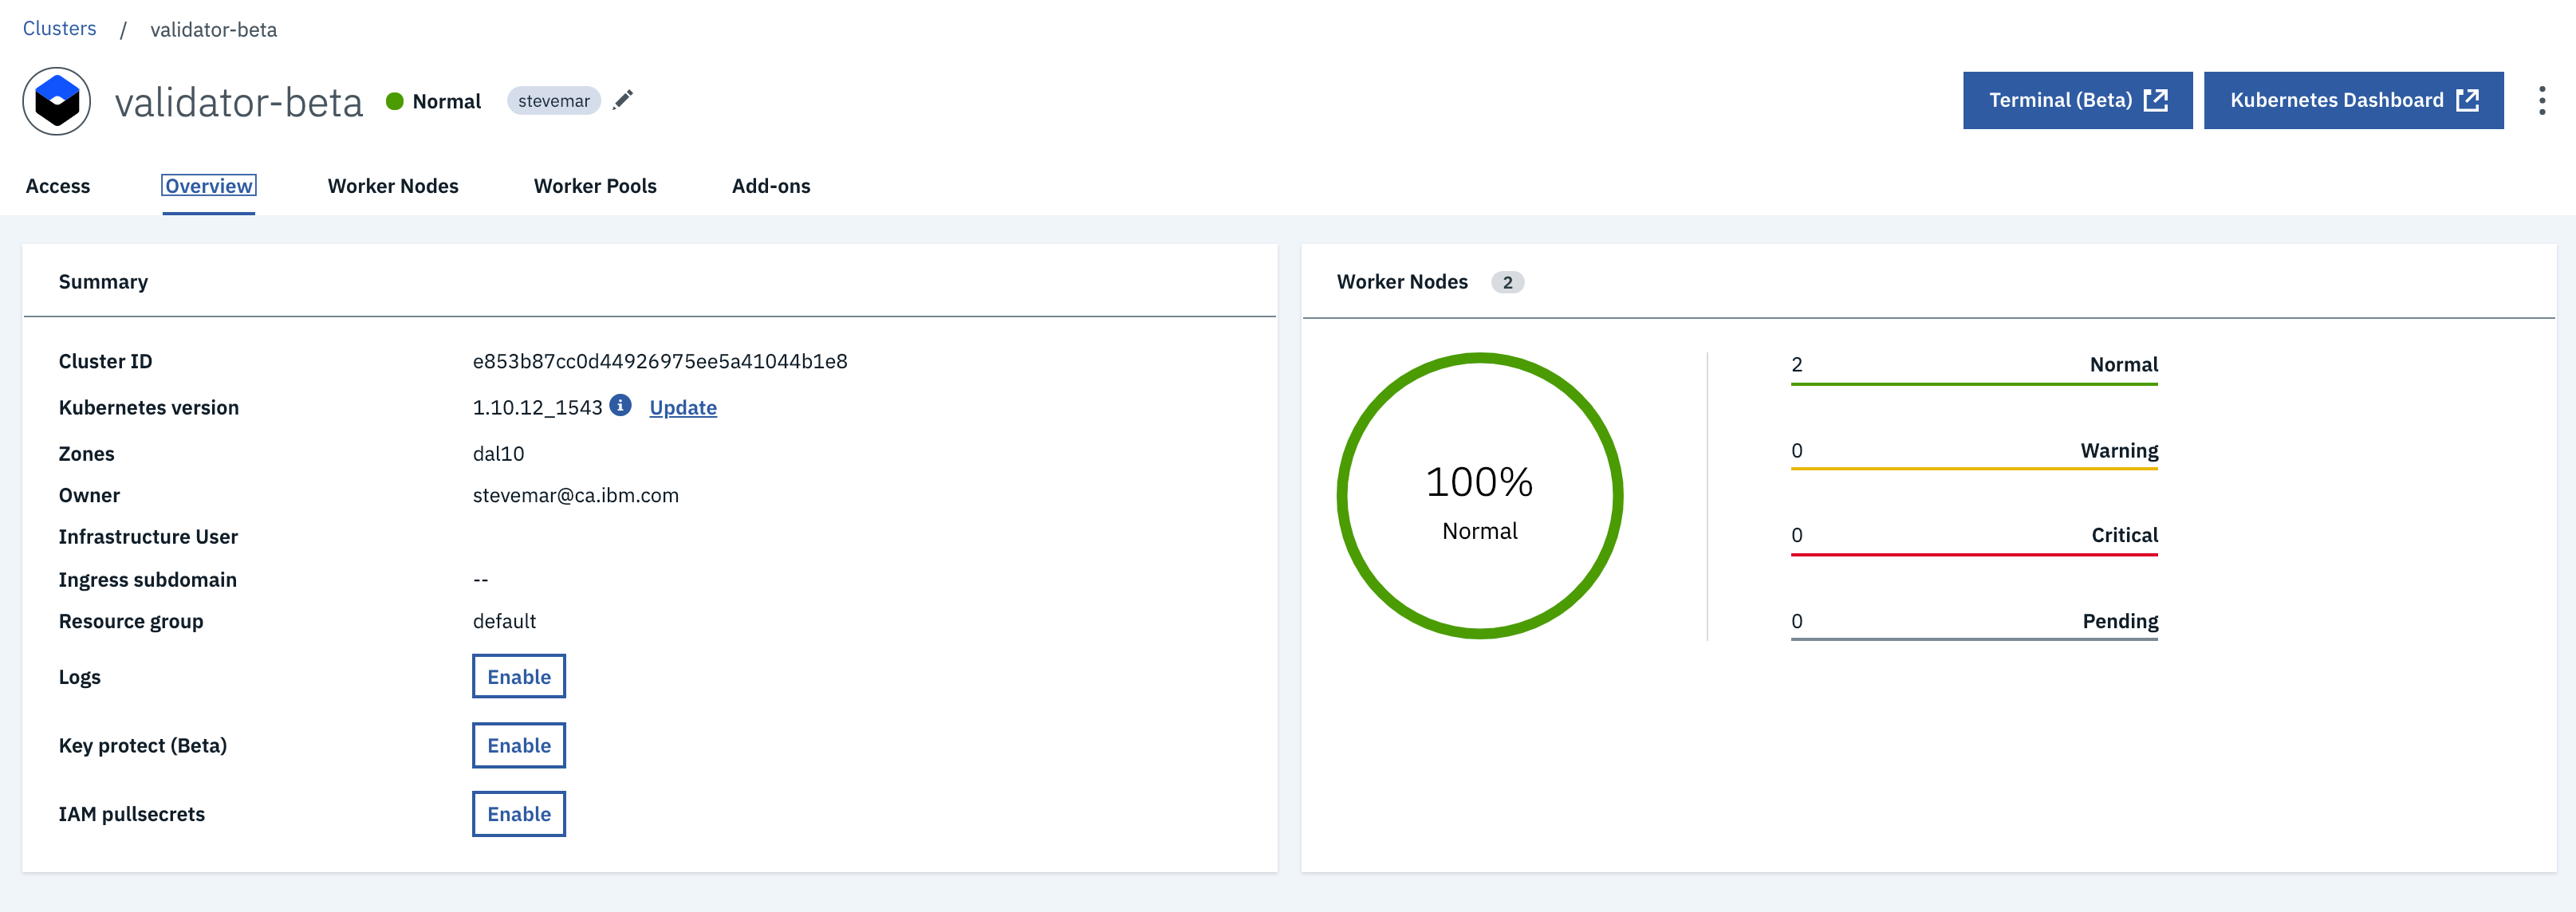
Wanting to go back to my terminal, we need to set up our kubectl CLI. Again, the IBM Cloud catalog was helpful and provided me with commands to just copy and paste. Now we can run kubectl commands! Yay ![]()
ibmcloud ks cluster-config validator-beta
export KUBECONFIG=/Users/stevemar/.bluemix/plugins/container-service/clusters/validator-beta/kube-config-dal10-validator-beta.yml
Deploy the app by pointing to uploaded container image
Now comes the fun part. Where we deploy by pointing to our image in the Container Registry, then we expose port 5000 because that’s where the app was set up to run. Neither of these commands provided any meaningful output.
kubectl run validator-deployment --image=registry.ng.bluemix.net/aida/validator
kubectl expose deployment/validator-deployment --type=NodePort --port=5000 --name=validator-service --target-port=5000
Find the external IP and port
Now to find where our app is being served, run the ibmcloud ks workers command to find your public IP address and kubectl describe service to find your NodePort. In my case the app is at 169.xx.yy.116:31760.
ibmcloud ks workers --cluster validator-beta
ID                                                 Public IP        Private IP       Machine Type        State    Status   Zone    Version
kube-dal10-cre853b87cc0d44926975ee5a41044b1e8-w1   169.xx.yy.116    10.177.184.133   u2c.2x4.encrypted   normal   Ready    dal10   1.10.12_1543
kube-dal10-cre853b87cc0d44926975ee5a41044b1e8-w2   169.xx.yy.241   10.177.184.141   u2c.2x4.encrypted   normal   Ready    dal10   1.10.12_1543
kubectl describe service validator-service
Name:                     validator-real-service
Namespace:                default
Labels:                   run=validator-service
Annotations:              <none>
Selector:                 run=validator-service
Type:                     NodePort
IP:                       172.21.189.136
Port:                     <unset>  5000/TCP
TargetPort:               5000/TCP
NodePort:                 <unset>  31760/TCP
Endpoints:                172.30.238.200:5000
Session Affinity:         None
External Traffic Policy:  Cluster
Events:                   <none>
Navigating to http://169.xx.yy.116:31760 shows up that the app is up and running. Yay! ![]()
Next post
Check out my next blog post where I push a new version!